Adding Records to the Database

Adding Records to the Database

There are three ways to add records:

  1. Hand entry from Grid or Data Sheet
  2. Duplicate an existing comp
  3. Bulk Uploads from a worksheet

Add Records by Hand Entry with the Database Editor

Similar to editing comps, new comps can be added from the grid or from a Data Sheet.

Hand Entry From a Grid

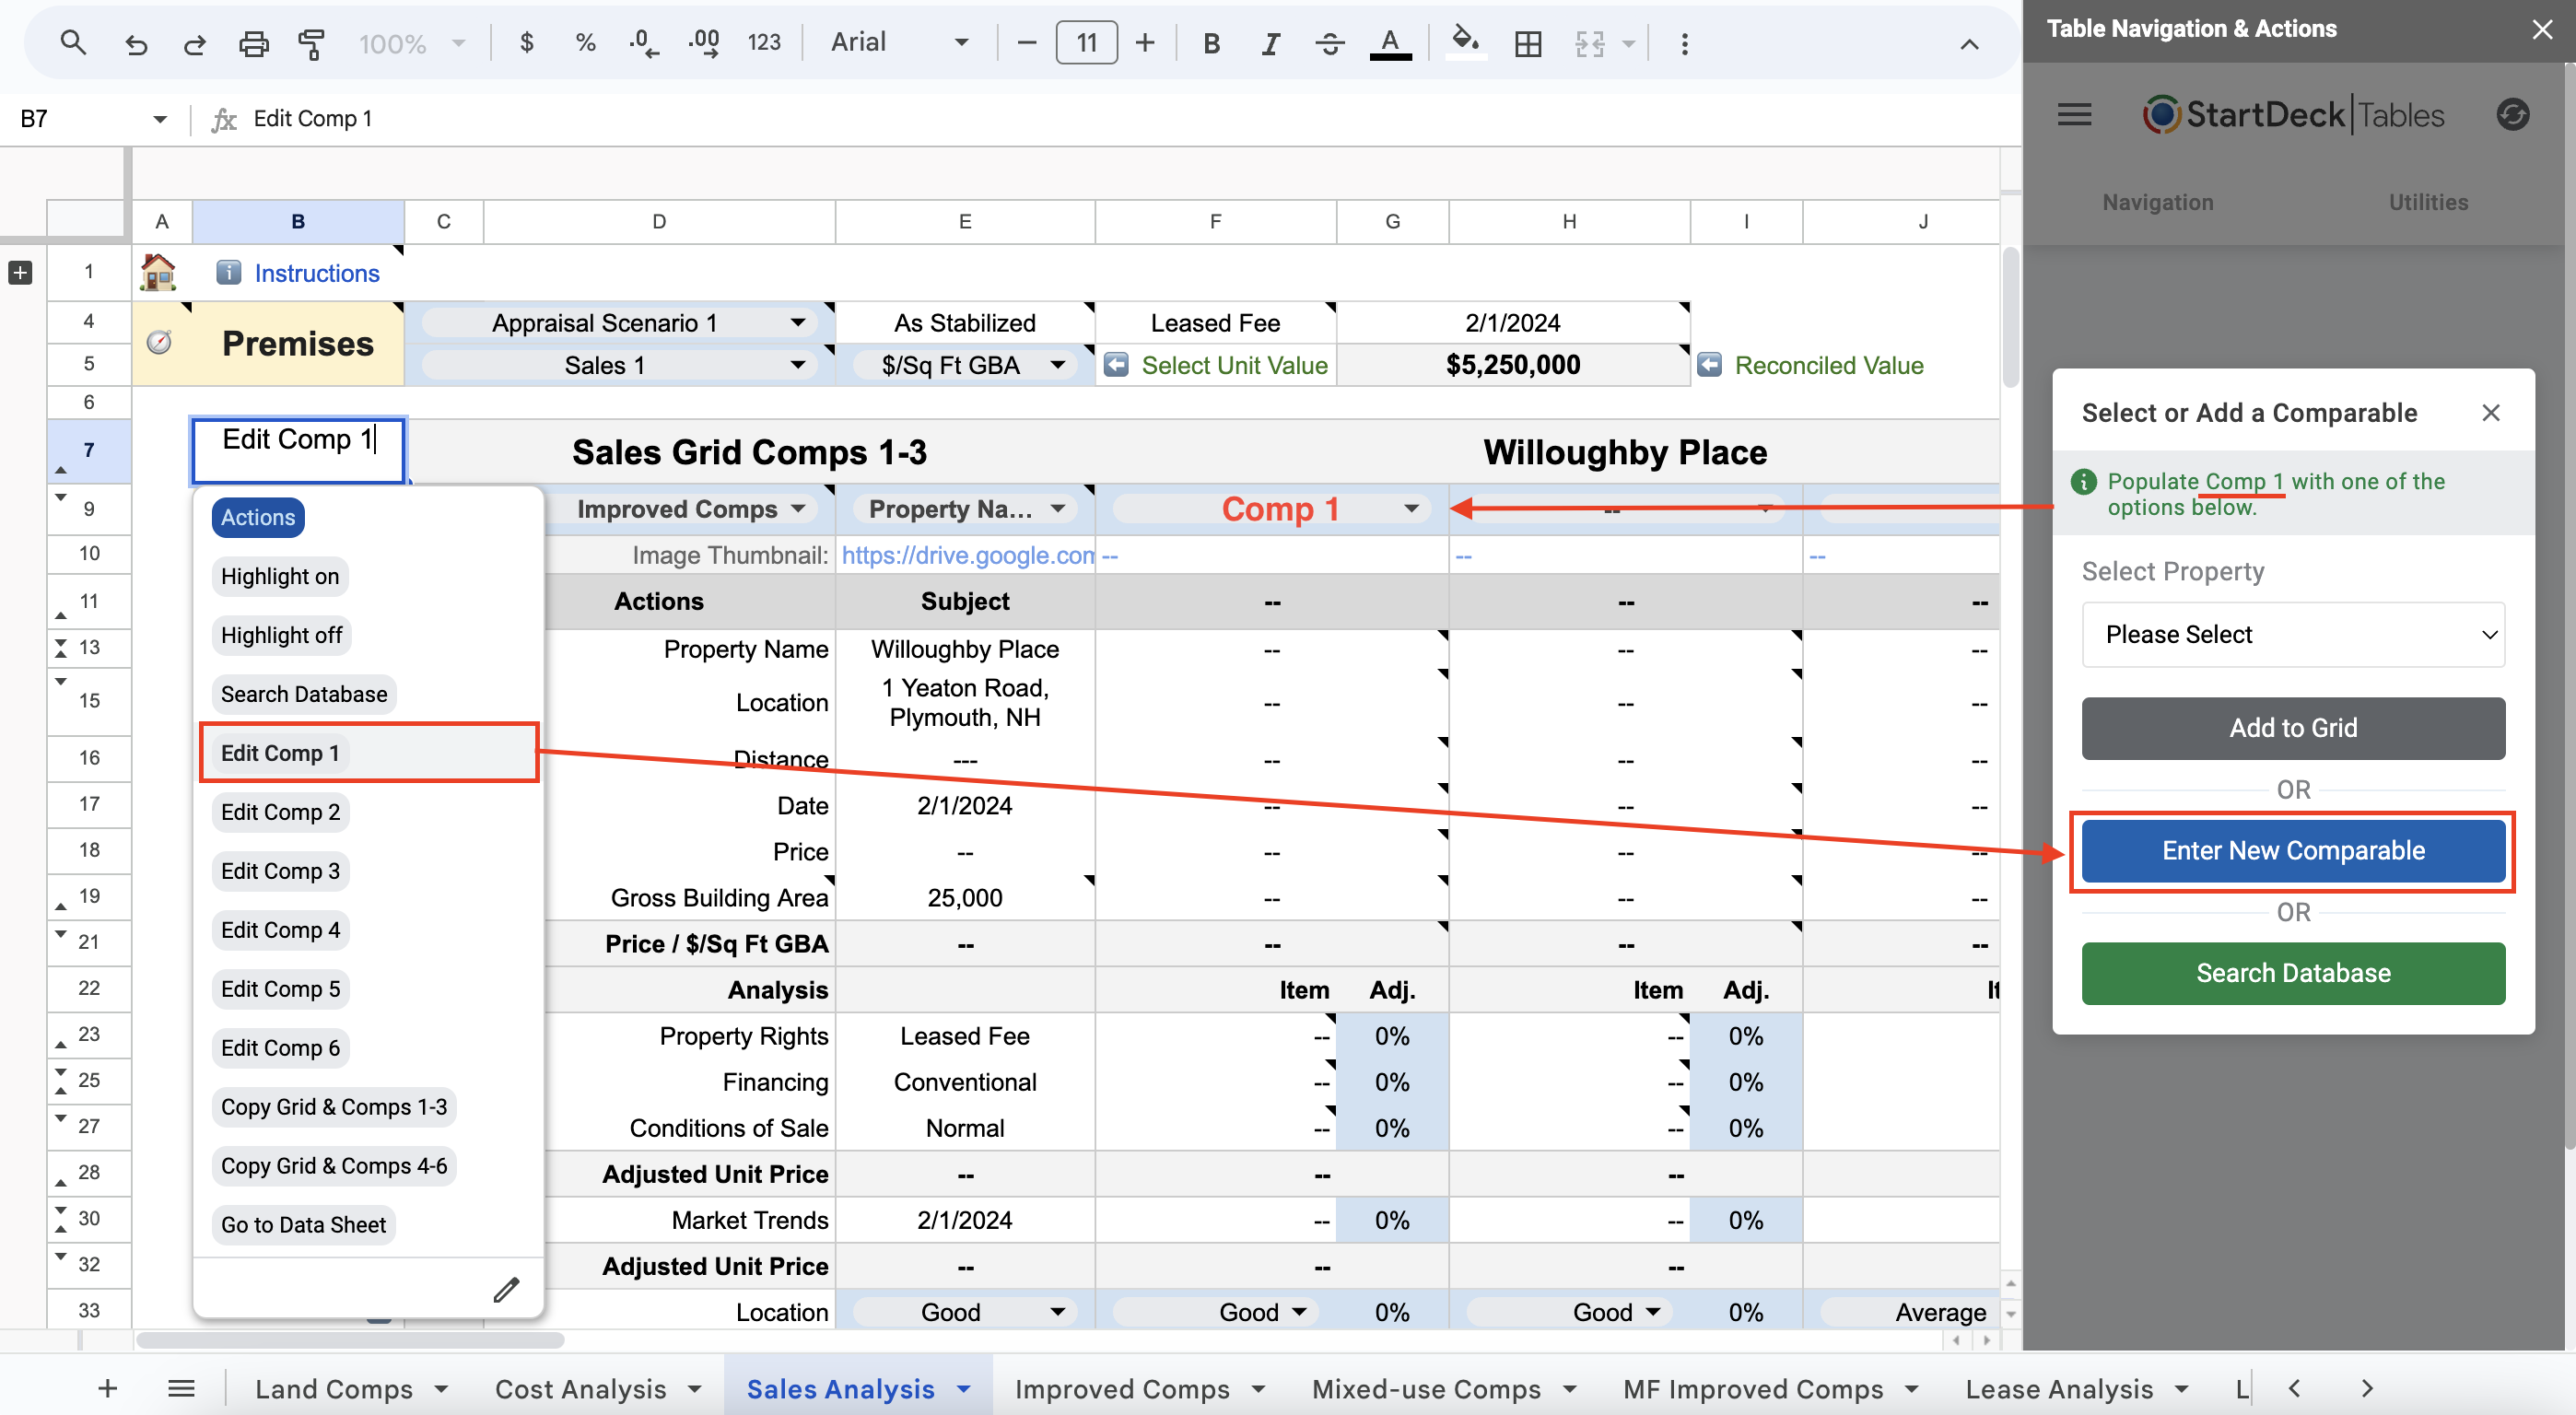
The assumption here is you want to add a comp directly to the grid for analysis. Make sure the StartDeck Tables sidebar is open and the comp column is empty, then from the blue Actions dropdown in cell B7, select Edit Comp #. This will display a form with an option to Enter New Comparable. Select that, enter comp data and save. This will populate the selected comp column and create a new record in the database. 

Hand Entry From a Data Sheet #

Records can be added from an existing Data Sheet established from a previous search and data import, or from a new Data Sheet

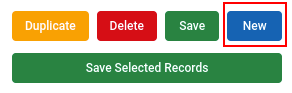
From the Navigation sidebar, select a Data Sheet and open the Database Editor. At the bottom of the sidebar, click the blue“New" button. This will clear the form of any existing data so that new data can be entered. 

Start by setting the property view for the new data — the form will display only fields that are applicable to the selected property type. 

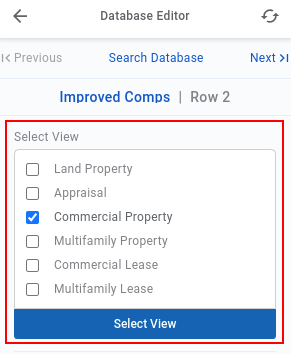
Note: Setting the database view sets the default view for the Data Sheet


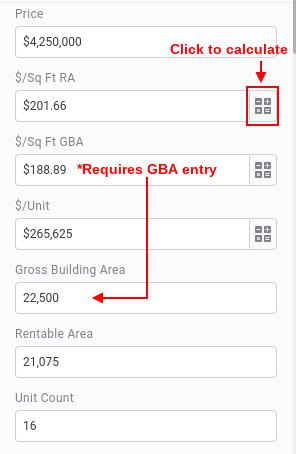
The Database Editor is now configured for data entry for the selected property type. Enter data from the top of the form down. Calculated fields can be calculated as you progress down the form, or use Calculate All Fields after the form has been completed. 


Best Practice Tip: Calculate each field as you progress down the form*, this will help you catch data entry errors or anomalies for the comp.  Then, when the record is completed, run Calculate All Fields and do a final review of calculated fields. 


*Note: Some calculated fields require other fields to be entered before the calculation can be run. For example, price per square foot requires the price and square footage fields to be completed for the calculation can be run.
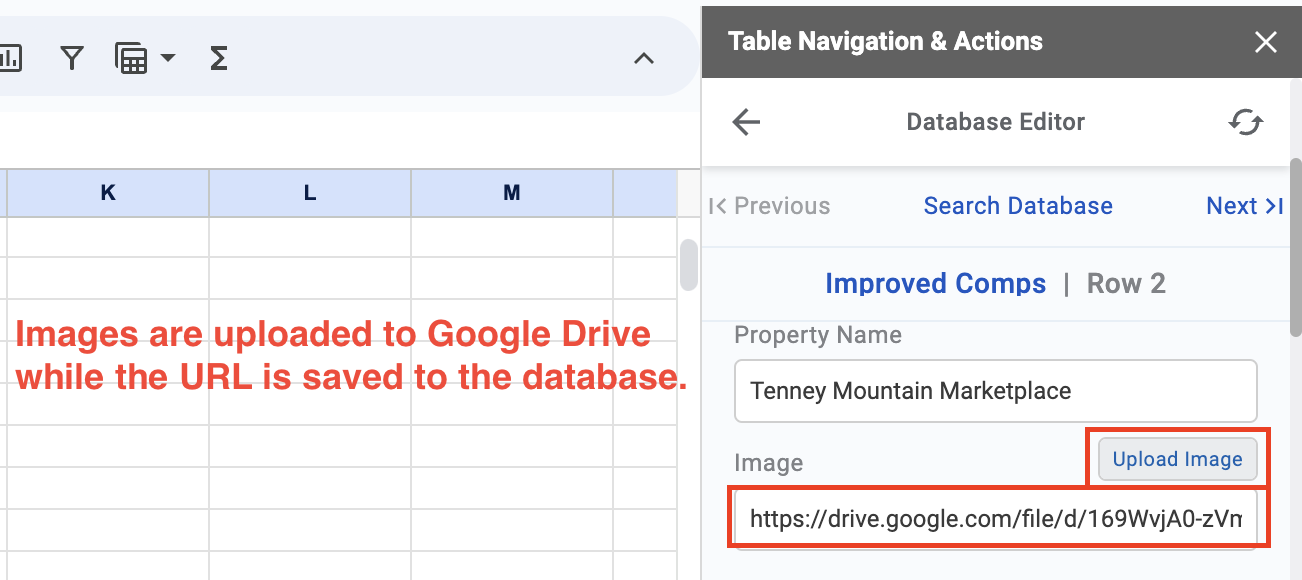


About Images

Rather than saving comp images to the database, the URL for comp images is saved. StartDeck creates a dedicated image folder for each project and uploaded comp images are saved to that folder: My Google Drive > StartDeck > Projects > My/Team Project > Images 
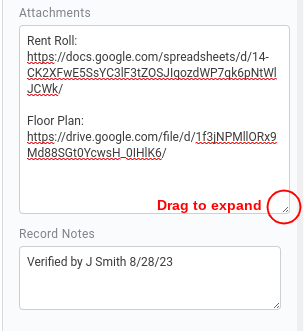
About Attachments

Similar to images, attachments are added to comp records by their respective URL to the Attachments fields, located at the bottom of the Database Editor form. At this time, attachments must be added to Google Drive manually, the URL copied and pasted to the attachment field. Multiple attachments can be added as needed. To expand the field, drag the lower left corner down.

Best Practice Tip: Label each attachment

Duplicate an Existing Comp #

  1. Open the record to duplicate in the Database Editor.
  2. Click Duplicate at the bottom of the Database Editor.
  3. Edit and Save.

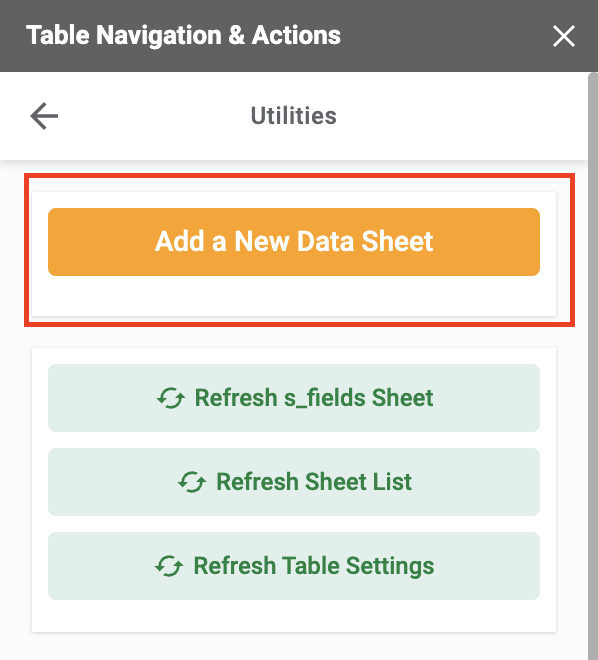
Direct Entry From a New Data Sheet # 

This is almost identical to using an existing data sheet. Simply go to Utilities, then select Add a New Data Sheet. This will open a new, blank Data Sheet. Add data for new records as described above.

Bulk Uploads From a Worksheet # 

The following process is technical and the first time around, time consuming. However, once the mapping is complete, future bulk uploads are much more efficient. 

StartDeck will do this for for free: Simply email the data file to support@startdeck.com. All data is treated as confidential, used for mapping purposes only and is not shared with any other party. 

Bulk Upload Steps

To bulk upload a table of data, follow these steps:

  1. Add a blank sheet to the appraisal workbook and name it“Source Data".
  2. Open your file that contains the comps you want to upload to your database. Make sure row 1 has column headers that identify the data in each column, such as Address, Price, etc. Select and copy all the rows that contain the data to upload, including the header row (row 1).
  3. Go to the“Source Data”sheet, select cell A1 and paste. Make note of the number of rows that contain records, excluding the header, we'll need this number later.
  4. Insert a blank row at row 2 and select the entire row.
  5. With the entire row 2 selected, add a drop-down in each column that contains a list of database fields. From the main menu: Insert > Dropdown. The will open the dropdown options sidebar. Select "Dropdown (from a range)", enter “_MasterFieldList”in the range box and click“Done".

  6. Now map the source data for upload. Starting in column A, row 2, select the field that best matches the field name in row 1. For example, if the field name in row 1 is "SALE_PRICE" the best match in the dropdown list is“Price".  Repeat this for each field name in row 1. Typically, not all fields will match and some will not be applicable. Simply leave the dropdown field blank in these cases. At this point the question often arises: Can I add fields to my database? See here for more info on this topic. 


    Images: Images are not captured in this process unless they are referenced by a public URL. More on this below.
  7. With the“Source Data" sheet as the active sheet, select Utilities from the sidebar, then click“Add New Records to Database" to add a new blank Data Sheet. Name this sheet“Data to Upload".
  8. Starting at row 2, select a group of cells that matches the number of rows of data to import observed in Step 3 above. Alternatively, select more than you need and delete unused rows later.
  9. With the group of rows selected from the previous step, paste this formula: 

    =if(iserror(HLOOKUP(A$1, 'Source Data'!$A$2:500, ROW(), FALSE)),"--",HLOOKUP(A$1, 'Source Data'!$A$2:500, ROW(), FALSE))

    This populates each cell with a lookup formula that retrieves data from the“Source Data”worksheet, or if there is not a match for the lookup, cells display“--".
  10. From the StartDeck Navigation sidebar, click“Data Editor”for the“Data to Upload" sheet, select the rows to upload and click“Save Selected Records". If the sheet is not showing in the sidebar, click the refresh icon at the upper right.
  11. Important: Remove all the double dash – entries from column A.

Tip: Export and save the "Source Data" sheet to reuse the mapping in the future. 


Bulk Uploads and Images

Bulk uploads do not capture images unless they are referenced by a URL accessible to the user. Typically a URL from the user's personal or shared Google Drive, or public URL. Otherwise there is not an easy way to bulk upload comps images. The following process is tedious, but works.

  1. Copy source images to a folder in your individual or shared Google Drive.
  2. Copy the image URL for each record and paste it to the corresponding cell in the“Data To Upload”sheet.

We are experimenting with scripted procedures to automate this process and welcome your suggestions: support@startdeck.com

See Also

Working with Images

s_fields and Images Fields


Related Articles

How to Setup the Database

Working With Grids

Comparables and Appraisal Database

Adding Records to the Database

Appraisal Data Schema

Appraisal Data Schema FAQs


How to Get More Help


Processing...